Plate File Format and Upload Instructions
Please follow the following instructions to prepare a plate file for upload using Microsoft Excel.
- Select all rows/columns - Ctrl-A
- Change font to Arial
- Change font size to 8
- Align Left
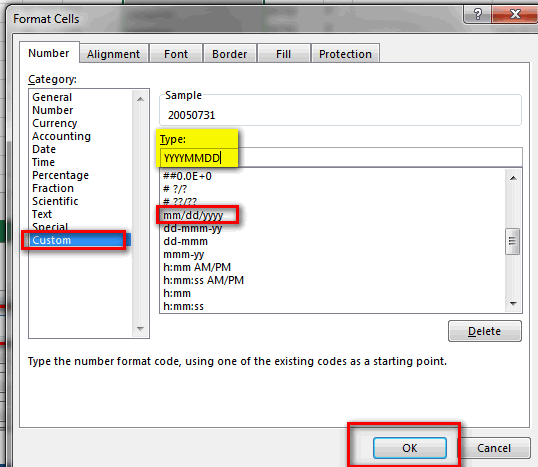
- Effective Date and Expiration Date Change Format Cells - Click on Custom, select one of the options provided and then you will need to type in the highlighted field: YYYYMMDD.
- Change all columns with your information:
Column A (Plate Number) - 8 chars,
Column B (Plate State) - 2 chars,
Column C (Plate Type) - 3 chars,
Column D (Effective Date) - 8 chars,
Column E (Corp #) - 5 chars,
Column F (Indicator) - 1 char,
Column G (Expiration Date) - 8 chars,
Column H (Register Last Name) - 45 chars,
Column I (Register First Name) - 30 chars - Delete the Header Row - first row should be the first record.
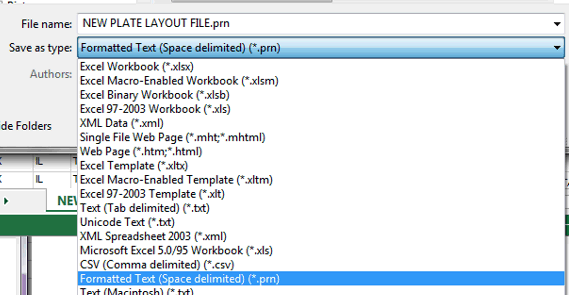
- Save file as space delimited - *.prn (see screen shot) - two popup messages click OK and Yes.
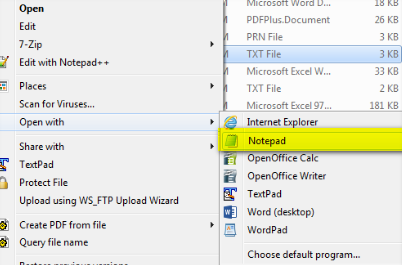
- Open the .prn file using Notepad.
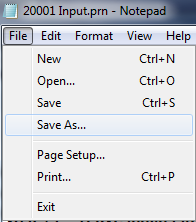
- File save as *.txt format (extension)
- Upload plate file using link Upload Plate File.
- Check status of uploaded file using link View Upload Status.